We will share everything from classroom management tips to technology that works for us in these blog posts. If it is something to help teachers, we will share it!

Laying the ELA Foundation: Essential Skills for Middle School Students

In this post, we will discuss how to lay the groundwork for essential skills during the first nine weeks of school. Our aim is to empower students with lifelong tools that extend beyond the academic year.

In the initial nine weeks, we focus on fundamental skills such as basic grammar concepts, distinguishing summaries from analysis, and brainstorming strategies for literary analysis prompts.

Building a Strong Foundation: Grammar and Analysis

We use daily bell ringers like Core Chomp and Daily Grammar Minutes to ensure students grasp grammar concepts thoroughly. Repetitiveness is key, just like in math, where early concepts support later learning.

Empowering Students with Analytical Skills

We guide students to analyze literature and uncover deeper meanings. We teach them our UAQ strategy—Underline, Analysis, and Questions—to dissect literary analysis prompts effectively.

Crafting Objective Summaries

Objective summaries are crucial for academic success. We teach students a formula to create concise and unbiased summaries, a skill they’ll use across subjects.

The Power of Word Choice

We emphasize word choice through narrative writing, improving vocabulary, and selecting appropriate words to convey ideas effectively.

Gist Statements for Close Reading

Throughout the first nine weeks, we train students to extract main ideas and key details using gist statements, boosting their reading comprehension abilities.

Understanding Themes in Stories

We explore how themes develop in narratives, helping students appreciate storytelling complexities and the messages conveyed by authors.

Versatile Skills for Diverse Genres

While fiction takes center stage during these weeks, the skills we teach, such as the UAQ strategy and objective summaries, apply to nonfiction texts too.

A Cohesive Learning Experience

By strategically incorporating these elements, we create an enriching learning experience for students that lasts a lifetime.

Access Our Detailed Pacing Guides

We provide a free pacing guide for the first two nine weeks, detailing daily activities and texts. It’s perfect for new middle school ELA teachers or anyone interested in our approach.

In conclusion, laying the ELA foundation in the first nine weeks equips students with vital skills for their academic journey. These versatile tools empower them to succeed not only during the school year but throughout their lives.

To access our pacing guide and learn more about our strategies, check the links in our show notes.

Middle School ELA Christmas Activities

Middle School ELA Christmas Activities

Add a little fun in your ELA class at Christmas time by reviewing important ELA skills and concepts.    We do realize that everyone does not teach in a school or community like ours, so some of these ideas may not work for your students.  Please be mindful of those students who may not celebrate Christmas.   We hope, however, that you can use at least one of our middle school ELA Christmas activities this year! 

Skits with a Twist!

Paper bag skits are a hit and can be used any time of year, but a Christmas spin can be put on these, and kids LOVE IT! Plus, it hits on the listening, speaking, and writing standards.   You can do this in two ways. 

  1.  Place five random items in paper lunch bags.   You will need a bag for each group of students that you have. Groups of four to six work best for this activity.  For Christmas, make the items placed in the bag Christmas related.  Think candy cane.  Christmas ornament.  Silver bell.  Etc.  Once the kids are in groups, give each group a bag.  Each group can have the same items or different ones inside the bags.
  2.   Instead of putting items in a bag, simply put pictures of the objects in the bag.  This will save time and energy on your part.  One group may have a picture of a candy cane, an elf, a grumpy looking man, a cabin covered in snow, and a cup of steaming hot chocolate.  Another group can have a picture of the Grinch, a gift, a gingerbread girl, a sled, and a reindeer.  The students take those pictures and write a skit to incorporate them.  They will have to act with imaginary items, so they will have to be creative in their dialogue and actions so that everyone understands what the item is.

After all of the groups are finished writing their scripts, allow students to perform the skit for the class.  You can require all students in the group to act or allow some of the more shy students the ability to walk through with signs or make sound effects “off stage”.   

While writing, speaking, and listening skills are all covered extensively, this activity is also perfect to review elements of drama, like stage directions and asides because you can tell students what to be sure to include as they write their scripts.  When students can effectively write an aside, they have a clear understanding of what one is and how they move a plot forward in a drama. 

As the class watches the skits, have the students choose the best and most creative skit. This makes this activity one of the  best middle school ELA Christmas activities because everyone is engaged in each part of the process.  

Middle School ELA Christmas Trees

One of our most useful and standards based middle school ELA Christmas activities is to allow students to decorate the classroom with ELA Christmas trees.  Using the large green bulletin board paper, cut out a large tree.  Then, give students printable shapes of ornaments.  Hold discussions about ELA terms.  I have found that middle schoolers have brains like junk drawers when it comes to ELA concepts.  Nothing is organized or categorized.  If you ask, Give me an example of figurative language,”  someone may shout out, “Adjective!”  This is because everything is jumbled.  Making different trees in your classroom can help your students categorize ELA terms and literary devices.  Make a grammar tree.  Make a figurative language tree.  Make a story elements tree.  You get the idea.  

You can split your kids into groups and have each group be responsible for a tree.  

You can also go a little deeper than categorizing terms and talk about how authors create things in stories.  For example, you can have a tree focused on the development of theme and the ornaments that go there can list these – characters, setting, plot… You can have one on how authors create mood.  Click here for a free printable that will give you ideas as well as printable ornaments for this project.

Analyze Figurative Language in the “Mr. Grinch” Song

The song “Mr. Grinch” is full of creative and hilarious metaphors and similes.  First, have students listen to the song closely to listen for any similes or metaphors.  Have them put tally marks on a chart each time they hear a simile or a metaphor.  You’ll need to give out a sheet of paper with two columns, one titled similes and the other metaphors.

  After this first lesson, discuss each example from the song and analyze its meaning. For example, one line in the song is, “You’re as cuddly as a cactus”.  Discuss what cuddling a cactus would be like and then why this simile was used to describe the Grinch. 

Assign each student one simile or metaphor from the song and have them illustrate it and write the meaning.  Then, have students practice writing their own original similes and metaphors like the ones used in the song.   We have a resource in our TpT store with some useful handouts for this activity if you don’t want to make up your own.   

Complete a Rewrite of A Christmas Carol

What is Christmas in ELA class without doing something with the classic story A Christmas Carol?   Perhaps one of the most important middle school ELA Christmas activities involves this classic story and movie.  We place students with a partner to rewrite a part of this story in modern day terms. We divide our class into groups and assign each group a scene.  Some work on the Ghost of present scene, some the Ghost of Christmas past scene, while others rewrite the Ghost of Christmas future scene.  We encourage our students to think about how social media and cell phones can change the story. 


Speaking of Scrooge, it is totally okay to watch the Christmas Carol movie as long as students do some comparing and contrasting to the original text.  For the past several years we have used the Disney version with Jim Carey’s voice as Scrooge.  It is great! To be sure that we have our kids focused, we have them fill out a simple movie viewing guide.  If you want them to compare and contrast the movie to a story or play version that you’ve read in class, you can have them fill out a Venn diagram.  Then, to be certain that they watched it, we have our students answer questions that are based solely on the movie.  Click here to purchase our questions to use for your own classrooms.  

Hold a Classroom Gift Exchange With a Twist and a Writing Assignment

Now, this next idea may be something that may not work as one of your middle school ELA Christmas activities, and we understand that.  But we wanted to share it just in case it is something that you would like to do.  Gifts are a Christmas staple.  And, in middle school, Christmas parties are usually a thing of the past.  So, we developed a ELA classroom Christmas gift exchange game!  Our students have loved it every year since! 

The kids do NOT buy something. Instead, they look around their house and find something to give away, and the funnier the better.  We have had kids bring in a dusty duck decoy, a potato, a can of beans, and even a roll of toilet paper.  We incorporate writing as well. 

Each student writes a paragraph that describes their gift in a creative way. We tell them not to use the name of the item in the paragraph, and to not use any words that are associated with its actual use. For example, if a student brought in an umbrella, they should not use the words umbrella or rain, or used to keep someone dry in their paragraph. Instead, we have them to brainstorm creative uses for the gift. For example, instead, you could write, “It can be used as a fly swatter or a swimming pool for a baby duck.”   The paragraph is used to make the other students think that this gift is the best!  

Students choose a gift and then read the paragraph to the class.  At this point, they don’t unwrap the gift.  When it’s the next student’s turn, that kid can either take another gift from the table or steal one that’s already been taken.  This is why the writing should be very persuasive.  Tell students that they want to “sell” their gift with the words that they write about it.  It is their challenge to make the gift sound like something amazing, even though it isn’t!

  At the end, once everyone has a gift, students all unwrap them at once.  This is when the laughter begins.  Once the unwrapping is complete, you can teach students to write thank you notes and tell them that no matter what gift they ended up with, they have to come up with a reason they will be thankful for it and how they will use it. 

To make this all happen, you will need some items on hand that can quickly be used if students forget to bring in something or cannot bring something.  You’ll also need to make sure you have wrapping paper and tape on hand.  Play Christmas music while you play this. 

Click here for a FREE resource that you can use to print some guidelines for paragraphs and a rubric. 

Watch Out for That Grinch Middle School ELA Games

We have created several PowerPoint class games called “Watch Out for That Grinch!”  These are hands down one of the most fun games that we play all year, and our students beg to play them over and over.  The Grinch is the “bad guy” in each of these games because when he shows up, he takes away all of the points a student has earned.  It is that little bit of luck that keeps the kids fully engaged in learning and entertained!   These Grinch review games we play are with figurative language, apostrophes, I or me pronouns, and capitalization. Check out our bundle of these games here. 

Christmas Short Story for a Quiet Day’s Work or To Leave for a Sub in Middle School ELA

If you’re like us, sometimes you need something to have on hand for a quiet class period or you are needing to plan for a day away from school. We have a cute Christmas story called “Christmas Everyday” we use for these times in December.  The story is about a girl who makes a wish to the Christmas fairy for Christmas to be every day and the trouble it brings when her wish is granted.  After reading the story, we have our students answer 15 multiple choice comprehension questions, analyze the setting to determine if it affected the plot or the characters, and identify the parts of the plot.  This Christmas short story with activities and questions is available in our TpT store. 


Merry Christmas, everyone!  We sure hope you found these middle school ELA Christmas activities inspiring.

Shannon and Tammy

Middle School ELA Thanksgiving Lessons

Middle School ELA Thanksgiving Lessons Your Students Will Love

There are so many fun middle school ELA Thanksgiving lessons that will make this time of year memorable.  We would like to share some of our favorites with you.

Turkey Stories

One of  my favorite Thanksgiving activities is an oldie.  I think I did this when I was in middle school, but I’ve never forgotten it.  Have your students write about Thanksgiving from the Turkey’s point of view. This makes an excellent activity on teaching point of view and on teaching perspective and how that perspective can create humor or suspense.  

Write a Thanksgiving Story From the Turkey’s Perspective

One option is to have your students independently write a story telling about Thanksgiving from the perspective of the turkey.  Before writing the story, have students do some brainstorming about the personality of their turkey and how things would be viewed through a turkey’s eyes.  Most students have a lot of fun dreaming up a personality for their turkey.  I always ask my students a few questions to get them started.  Will your turkey be a country turkey or a city turkey?  Will it be a shy turkey or the life of the party?  As a class, brainstorm all different types of personalities that people can have, and then allow students to choose one for their turkey.  This generates excitement and really brings the story to life. 

Opportunity to Teach Dialogue and Dialect

You can spend time talking about how dialogue should match the personality of a character, and teach students about dialect.  If your turkey is a valley girl, (that may date me.  I don’t know if that term is in use anymore) you will want your turkey to say things that match it.  So it may sound like, “I was like totally minding my own business when like this man wearing like leaves on his shirt like showed up in my part of the woods.” 

You can even show some clips of movie characters to explain this.  Think about the turtles on “Finding Nemo”.  They have that surfer dude persona, and their dialogue matches it.  

The other brainstorming you will want to do before students write the story is to really get into the mind of a turkey and to think about how things could be described.  In the story “Rikki-tikki-tavi,” Nag and Nagina, the two cobras, don’t call a gun a gun.  They call it a bang stick.  Have students use this same strategy of naming something unknown for their turkey.  What would they call a table if they didn’t know it was a table?  Maybe a big log with legs?  What would they call a human?  A knife?  An oven?  This is a fun part of the process.  

Once your brainstorming is done, your students will be ready to write a story.  There are a few way this can be done as well.

  1.  Let them write it individually and share them when they are done.
  2. Let them work with a partner.
  3. Let them write and pass the story.  One group writes the beginning of the story and then passes it to the next group who continues it.  This way, depending on how many groups you have in your classroom, there would be maybe four stories going at once that could be read afterward.  

A Quick Write if  You Are Short on Time

Now, if you don’t want to have students write a whole story, but you still want to do an activity where the students learn about perspective, you can have them do what we call a quick write. Have them write a short description of something that is a part of Thanksgiving from the perspective of the turkey and let the rest of the class see if they can guess what it is.  For example, one student may describe an oven from a turkey’s point of view.  Another student may describe pumpkin pie.  

If you would like another idea on quick writes, this link will take you to our blog on strong verb paragraphs.

A Resource for You!

We have a free resource in our TPT store  that has some printables that you can use for the Thanksgiving from the turkey’s point of view activity.  This resource also has an option that you can use as a guided writing exercise.  In this one, your students will fill in the blanks for the first paragraph of their story as they decide on a setting and then  write as if they are the turkey and they hear someone creeping up on them.  The questions will guide them in writing what happens next, and they will end up with a very suspenseful tale of their turkey.  These stories can be written in one class period and can turn out pretty funny! 

Thanksgiving Poetry

Acrostic poetry is another perfect middle school ELA Thanksgiving lesson.  These are simple, but perfect for reflection.   If you want to make it more meaningful, have your students write it about things that they are thankful for.  I have even told my kids that it would be special if they could write one that could be read at their thanksgiving dinner.  Some kids in the past have even written an acrostic poem prayer that could be read for their family.   

T

H

A

N

K

F

U

L


A Reading Passage

If you’re looking for something to have on hand for a quiet class period around Thanksgiving time, or if you know you’re going to be absent, we have a cute Thanksgiving story called “Wishbone Valley”.

“Wishbone Valley” is a short story about a boy who faces a lot of trouble after running into the ghost of a Thanksgiving turkey. After reading the story, your students can answer our multiple choice comprehension questions or practice writing an objective summary.  This resource is available in our TpT store.

Play a Thanksgiving Game!

 We also play a Figurative language review game called “Watch Out for That Turkey.”  It will keep your entire class engaged as you  review the types of figurative language: simile, metaphor, idiom, personification, hyperbole, oxymoron.

This is a game of luck. There are twenty questions to review figurative language. Some questions ask for students to identify the definitions of figurative language, and others ask students to decide which type of figurative language is at use in a sentence.

After students answer a question, you will go over it using the answer key slides, explaining why the answer is right. Only after they have listened to the right answer and an explanation, will you allow them to choose a colored box on the slide. There are three colors to choose from per round/question. Those students who get the question wrong cannot choose a color for that round.

Behind each colored square is a number. Students earn the points on the card. Here’s the kicker, though; Turkeys erase all points earned so far. So if a student chooses a color with a turkey behind it, all points earned so far are wiped away for that student. This is what keeps the students excited and into the game. They never know when a turkey may be overturned.  If you’d like to play that game, you can check out our TPT store!

We hope you enjoy these middle school ELA Thanksgiving lessons, and we hope you enjoy your Thanksgiving break with your family and friends!


Review Games for the ELA Classroom

Review Games for the ELA Classroom

We all know students love review games, and while there are plenty of online game platforms, like Gimkit, Kahoot, and Blooket, sometimes, it’s nice to unplug and play exciting games without those Chromebooks.  Often, these are more engaging review games for the ELA classroom, not only for the students, but also for us as the teacher.  

Some of our favorite review games for the ELA classroom that we have played over the years include the following: “Attack the Castle,”  “Piece it Together,”  “Pop,” “Skunk,” “Pass the Chicken,”  and a game called “The Joker”.  We just know that you and your students are going to love them!

These review games for the ELA classroom will work for just about anything you need to review.  It could be literary terms, vocabulary terms, grammar questions, etc.  

Attack the Castle

Attack the Castle is a fan favorite for students!  Divide students into groups of three to five students.  You decide how many students per group depending on your class size.  Allow each group to send one person to the board and draw a castle or any other mansion, house, tent, or structure they want to attack.  You could save time and print some different castles and place them on the board or around the room.  Take turns choosing a task card (fancy term for question) for groups to answer.  If the group answering gets the answer right, allow them to “attack” one of the other group’s castles by placing an X on it.  If the group answers the question wrong, the teacher puts an X on that group’s castle.  Once a castle has three Xs, it is destroyed.  However, the team can still play to get revenge on other groups.  The group with the last castle standing is the winner. Click here for printable directions for Attack the Castle.  

Piece it Together

Piece it Together uses  an easy puzzle for each group of students.  You can buy these at the Dollar Tree.  Try to find puzzles that are no more than 25 pieces. We found some in small metal tin cases.   Provide a question to the groups.     You may let the group confer when answering or require one person from the group give the answer per turn.  If the person in the group gets the answer correct, they can earn one piece to their puzzle.  The first team to earn all of their pieces and put their puzzle together wins.  Click here for printable directions for Piece it Together.

Pop

Pop is such an easy and quick game to set up!  You will need task cards (questions)  and some additional printable POP cards – just cards that say “POP”.  Put the task cards along with the POP cards in a container.  Walk around and let students take turns taking out a card.  Do not allow them to see into the container.  If they pull out a task card with a question on it,  they must give the correct answer.  If they get the answer right, they get to keep the card.  If, they get the answer wrong, the card goes back in the container.  If the student draws a POP card, he/she must put all of his/her cards back into the container.  This game won’t end on its own because the cards can keep going.  Set a time and when the time is up, the student with the most cards wins.   This game is really perfect for vocabulary words.  Keep a can with a few “POP” cards in it on hand, and drop in your vocabulary words each time you begin a unit.  Any time you have a few minutes of class time to spare, you can play Pop!   Click here for printable directions and POP cards.

Skunk

The only things you will need for Skunk is a set of task cards with your questions, one set of dice,  an answer sheet and point chart.

Write each letter of the word SKUNK in a column going down on the board.  So there is a S column, a K column, a U column… you get the point.

This is how you play:

Each letter of the word SKUNK is a round.  A round does not end until a number one is rolled on the dice.  For the first roll of the dice in round one, each student in the class stands up.  The teacher rolls the dice.  Add the two numbers on the dice together.  That is the amount of points that the students may earn for that roll.  Put one of the task cars up on a visual presenter or read them a question.  Have students write down the answer to the card or question.  If they get the answer right, they earn the points.  If they get it wrong, they earn no points.   When it is time to roll again, students have to decide if they want to remain standing or sit down because if a number one is rolled at any time, those who are standing lose their points for the round and then the round ends.  Play then goes to the next round (next letter in SKUNK)

Students can decide at any time in each round to sit down and save their points to stay standing and risk them. 

*If two ones are rolled, those who are standing lose their points for the whole game.  The game ends once the last round is completed.  Students will learn strategy and review content at the same time.  Click here for directions and score cards for the game Skunk.  

Pass the chicken

For this game, you will need a rubber chicken, a stuffed animal, a potato, or any other item you wish to use.  It’s basically the hot potato game.   Have students sit in a circle.  Play some music.  Stop the music at random intervals.  Whoever is holding the chicken when the music stops has to answer a question.  If the person answers correctly, give candy or a point.     Click here for printable directions for Pass the Chicken,

The Joker

We have a really cool game called the joker that we use around Thanksgiving and Christmas time.  This game uses Google Slides, but only you need the slideshow, not the students.  Here is how it works.  There are slides with questions on them.  Those students who get the question correct get to pick a card on the next slide.  There are three cards on the slide, all different colors.  Students record the color of the card that they are choosing.  So kids will write down, blue, green, or brown.  Once kids have chosen and written down their colors, you simply click on the cards and they turn over. (We created this game with triggers so that this works automatically.)  When the cards turn over,  a playing card will be revealed, like a 10 of hearts, a 2 of diamonds, a king, or an ace.  Each card is worth the points displayed.  And a jack is worth 11, queen worth 12, king worth 13, and an ace worth 14.  The Joker, however, steals all the points so far. 

With our Thanksgiving figurative language review game, we have a turkey in place of a Joker, and if a kid chooses a color with a hidden turkey behind it, he/she loses all of the points he/she has earned so far.  There are only a few turkeys placed throughout the game, but it keeps kids on their toes and excited. They absolutely love it!

You can play this game with an actual deck of cards, using the Joker.  You will just need kids to take a card from the deck and pass it on.  Click here for a link to those directions that go along with simple, compound, complex sentence review.   If you want to use the Google Slides version, we sell these in our TpT store.  Our Christmas games use the Grinch instead of turkeys.  We have several of these games available in our Tpt store to cover different topics.  For Thanksgiving, we have this game available for figurative language, and for Christmas, we have it for figurative language, apostrophes, I or me pronouns, and capitalization.  We also have a Joker game ready for you to use with anything you need to review! 

We have many task cards  for grammar concepts!  If you’re looking for those, you can purchase them  in our TpT store!  We have several free  sets as well.


BINGO Cards in Middle School ELA!

How we started to use Bingo cards in Our ELA Classrooms

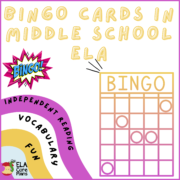
In an effort to find a fun way to encourage students to read, we started using an ongoing Bingo game for novels.  We used these cards for student’s independent novel choices and book club books. The Bingo charts were such a hit that we started using them for our vocabulary words and for Greek and Latin roots too!  We are excited to tell you all about how it works!

Fun!

Now, we all know why BINGO cards work.  Let’s face it, middle school kids love prizes.  Some of our favorites to use in class are candy, stickers, and unique pens and pencils! 

We’ve found that on Amazon, you can order packs of stickers that don’t cost too much.  We order the kind that can be put on water bottles or phones or laptops.  Kids love them! We put up a pocket chart to display these stickers, and some kids would rather have one of these than candy.  

How to Use The Reading Bingo Cards

Here is how the Bingo cards work.  Each student is given a card.  The cards have statements that require students to find certain sections, characters, connections, or literary devices in their reading.  For example, one square may say, “Find a section of the novel that has a flashback.”  So, as students are reading, if they notice a flashback, they go to that bingo square for flashback and record the page number and the first few words of the flashback.  

If that section of the book is being discussed in class or in a small group for book clubs, the student can bring up the flashback and the group or the class can discuss what the flashback means and why it was important.  When a student has filled in five squares in a row, they of course have BINGO, and they receive a prize!  That keeps them motivated and engaged.  

Now We Add Vocabulary Bingo Cards!

Students loved the novel bingo cards so much, we decided to try BINGO cards with our vocabulary words.  The vocabulary Bingo card can be used with any vocabulary word list.  Each block on the card has two letters of the alphabet.  The first box has letters a and b, the second block has letters c and d, and so on.  All of the letters are repeated on the squares once.  Students fill in words that they see in their independent reading. They also record words they hear a teacher say or words they correctly use in their speaking or writing.  They must write the words in the box that has the letter that the vocabulary word begins with.  So if one of their words is disdain, they will write that word in the box with the letters c or d.    To document, students must do the following.

  • For a word that they see in a book, they must record the page number and title of the book.
  • For a word that they hear a teacher say, they must get the signature of that teacher on the square that has that particular word.  
  • Also, the student should write the sentence in which the word was used.   For this, students will need to use the back of the card for the sentence documentation.  

And, like with the book club bingo cards, when students get five in a row, they earn a prize!  We also do one bonus point on a vocabulary test along the way. They show us the card and we initial and add the point on the next test. 

We would like to give you these vocabulary bingo cards free of chargeClick here for the free cards in our TPT store!  

The Vocabulary Curriculum We Use

The two main things we incorporate into our vocabulary curriculum are repetition and mnemonic devices. 

Way back in 2006, we created a bell ringer called Daily Dose.  Since then, we have changed, updated, and improved it. What makes this resource  so successful is that it contains a word of the day that is accompanied by a funny mnemonic story.   This is what ensures that kids remember the word.  We swear by our silly mnemonic stories that accompany our vocabulary words! We have both had students whom we taught 20 years ago tell us that they still remember words and the silly story that goes with them.  “Mrs. Temple, I remember that word smug and how that man was so caught up on himself and smug that he put his face on all of his mugs.”  

The other component to a successful vocabulary component is repetition. In our Daily Dose bell ringer, there are 90 words for the first ninety days of school. Then the remaining 90 days are spent reviewing the 90 we’ve already learned.  There is no sense in piling on 20 vocabulary words a week for students to memorize for a test and then forget.  If your students can walk away from your class at the end of the year truly owning 30-40 new vocabulary words, that is astounding.  

Each and every Daily Dose bell ringer provides a word, a mnemonic, the word in context, along with editing questions and a standards based question.  

Recently, we created a new 8th grade vocabulary words of the week resource, and unlike Daily Dose, it is not a bell ringer.  But it still has the silly mnemonic stories and repetition.  

We have recently started using the Bingo card game with these vocabulary programs.  Our students enjoy this added  component! 

Below you will find the links to these vocabulary resources in our TPT store. If you don’t already have a vocabulary program that you like, you can try out one of ours! 

6th Grade Daily Dose – Click on the Preview button for a sample!

7th Grade Daily Dose – Click the Preview button for the sample!

8th Grade Daily Dose – Click the green Preview button for the sample!

8th Grade Vocabulary Word of the Week

How to Create Suspense Writing Lesson

Suspense is one of those literary elements we all want to know how to use, especially when we are telling or writing a good story and want others to pay attention.  This SHORT narrative writing exercise will teach students how to create suspense, and it is guaranteed to be one of your favorite lessons of the year!  

You’ll want to start by talking to your students about what suspense is and how authors create it.  You can have a discussion about stories or books they’ve read that made them sit on the edge of their seats with anticipation.  You can also talk about movies that foster suspenseful engagement. 

 I usually complete this lesson in the first nine weeks right after we’ve read suspenseful stories like “Lamb to the Slaughter,” “The Tell-Tale heart”  “The Monkey’s Paw,” or my favorite, “Duffy’s Jacket”.  

We make an anchor chart titled How to Create Suspense, listing all of the ways that authors of these stories create suspense.  We also discuss literary elements like dramatic irony, unreliable narrators, and foreshadowing.  We talk about how authors use pacing techniques to slow down their stories in the right places in order to capture their readers with just the right amount of tension.  Once we’ve learned all of the literary devices and techniques that create suspense, it’s time to use this quick narrative writing exercise, allowing students to create their own tiny stories full of suspense!  This would be perfect for October or close to Halloween, but truly, it is a lesson that can be used any time of the year. 

 I found this quick narrative writing  lesson years ago online, and it is one that I’ve always held on to just because the kids LOVE it.  It truly teaches them how to use pacing to create suspense.  I have even found that it helps me when telling stories, as the exercise has taught me how to hold attention at the right places.  Here’s how it works. 

How to Create Suspense Narrative Writing Exercise Directions

  • Have your students take out a sheet of paper or open a Google Doc if you want them to type. 
  • Explain to students that  it is important that they must follow your prompts and not get ahead of you.  Tell them that they will be writing one sentence at a time to create a “tiny suspenseful story” and that you will guide them in what they will write by telling them what to do each step of the way.   
  • Have students begin by writing the following line.   He thought he heard something.  Tell them they can choose whether to use a girl or a boy as the character, so instead of saying He, they could write She.  You could also allow them to write it in the first person point of view and use I thought I heard something.  
  • Now, lead your students to add more sentences by providing the following prompts.  Provide time for students to write their sentence before moving to the next.  1.  What did it sound like?  2.  What was your character thinking?  3.  What did your character smell that was out of the ordinary?  4.  What memory did this scent bring up in your character’s mind?  5. Now, connect this memory to the present moment for your character.  6.  Have your character notice something different or not quite right.  Maybe he/she sees something strange or notices something he/she didn’t notice before.  7.  Have a question go through your character’s mind.  8.  What does your character want to do right now?  9.  Have your character take some sort of action.  10.  Put an obstacle in the way, something that keeps the character from doing what he/she wanted to do.  11.  Have your character either return to the memory he/she had for courage or think of something else that gives him/her courage.  12.  Have your character move closer to the sound or smell.  13.  Let your character discover what it really was.  Maybe it was nothing, or maybe it was something!
  • You can print a copy of the sentence prompts by clicking here.

After students are done writing, they will most likely be eager to read their stories to the class. Allow time for this and celebrate all of the different ways that they created suspense.  To debrief, discuss how the pacing was used to create tension and how they can use this strategy in future narratives.

We also combined this lesson with our favorite Thanksgiving writing activity, write about Thanksgiving from the turkey’s point of view.  If you want a way to use this writing exercise on suspense in a humorous way around the holidays, this Thanksgiving version is for you!  You can download the FREE resource from our TpT store by clicking here.

Why Short Narrative Writing Exercises Make Sense for Middle School ELA

One reason these narrative writing exercises are so beneficial to us is because they are short.  This lesson on suspense can be completed in one class period.  As middle school ELA teachers, we have so much to cover in one year.  Our students also have short attention spans, and middle schoolers feel accomplished when they can complete an assignment in class, without having to finish on their own. 

For us, short narrative writing lessons are essential to teach the narrative writing standards.  We teach in SC, and our students have to write a text dependent analysis essay on the end of the year on our state standardized test.  The very real pressure of preparing students for that type of writing assignment can be stressful.  Responding to a TDA is a FEAT for middle schoolers, but teaching students to analyze, explain, and provide evidence for their analysis truly is important because this is the type of writing they will be expected to do throughout high school and college.   The problem is that it takes all year to effectively prepare our students to be proficient analyzers alone, not to mention proficient writers.  There just doesn’t seem to be enough time to spend on writing narratives too.  That’s why we sprinkle in short narrative writing assignments like the one discussed in this blog. 

If you teach in a state that requires students to write a text dependent analysis essay, and you need some help in how to teach them in an effective, process approached way that works, we have a complete course on effectively teaching students how to write a text dependent analysis, including a free mini course providing the first steps of teaching students the difference between summary and analysis.   Our free course has presentations, handouts, and lessons that you can use ASAP in your classroom.  If you like what’s in the free course, ask your administration about purchasing our complete course on teaching students to write TDA essays.  You’ll have everything you need to effectively teach every step of the process! 

Middle School ELA Halloween Lesson~ Our Collection

If you are looking for a fun Middle School ELA Halloween lesson, we are here to share our best and most memorable ones from over the years. We’ve been teaching for quite some time, to say the least, so we have collected several fun and engaging middle school ELA Halloween lessons.  In fact, we have so many fun ones to choose from that now is is hard to figure out the one that we want to use in our classrooms each Halloween season.

Of course, any good scary story is perfect for a memorable middle school ELA  Halloween lesson. Dim your classroom lights, play some spooky organ music while your students are entering the room, start your fog machine.  Okay, maybe not a fog machine, but you could put up a picture of fog on your screen!   Then, read one of the following stories.  We’re going to sprinkle in some of the spooktacular fun we’ve had while reading these favorites of ours!  It’s worth the read!

Perfect Stories for a Middle School ELA Halloween Lesson

  • “The Highwayman” ~Actually, this isn’t a story, but it’s a narrative poem that tells a ghost story. It makes the perfect middle school ELA Halloween lesson because it’s short and captivating.  After reading it, discuss with your students how the poetic elements such as repetition and rhythm help contribute to the spooky mood of the poem.  I always have one or two kids that have good rhythm keep the beat on their desks while I read it aloud. Afterwards, you can have your students write their own story or poem about Bess and the Highwayman and how they continue to haunt to this day.  If you’d like some other standards-based activities for this poem, we have a “Highwayman” Teaching unit in our TpT store. 
  • “Three Skeleton Key” by George G. Toudouze is not that scary, but it is truly a disturbing short story, for lack of a better word. It’s not too disturbing for middle schoolers though.  Our middle schoolers love it! It’s about three men who find themselves trapped in a lighthouse, and that lighthouse ends up being attacked by rats. Thousands of starving rats are literally trying to get into the lighthouse and eat the men alive. I’ll never forget one year we were reading this story, and Tammy (my colleague) and I found remote controlled rats.  Right in the middle of the story, we electronically ran those suckers out into the middle of our class. For a split second, our students were stunned and afraid, but then they saw that they were mechanical, and we all laughed and laughed.   It brought some fun, which is important to incorporate in your ELA class from time to time. This story used to be in our Holt textbook, but you could probably find it online.  You can also find this story on Actively learn, a free website that provides stories that you could send to your students.  We also have a teaching unit for “Three Skeleton Key” in our TpT store.
  • “The Monsters Are Due on Maple Street” ~This is a teleplay written for The Twilight Zone.   It’s about a neighborhood where all sorts of strange things start happening after a flash shoots across the sky. First, their power goes out; then the phone lines stop working. Then, other strange things start to occur.  One little boy who reads comic books tells the neighbors that he read about aliens, disguised as humans, who visited a town and caused problems.  This causes the neighbors to be suspicious of one another, and the conflict arises because the neighbors start to blame one another.    One year before I read the story, I staged several spooky happenings to occur in my classroom. I arranged for Tammy to call my room three or four times and just hang up. This occurred before we read the story. My phone would ring. I would answer it saying, ” Hello, hello?”  And I’d tell my class,  “Well, I don’t know what’s going on. Someone must be messing with me.”   I also set an alarm to go off by itself, and I said, “I don’t know what  is happening in this classroom today.  Something strange is going on.” At this point, we would start reading the play.  So, I already had their imaginations primed before we even started.  Then, in the middle of reading it,  I would stop and look at my kids as seriously as I could and I would say, “I’m here to tell you that I’m not really your teacher. I’m an alien. If you go to that door, you’ll find it locked.” Now, mind you,  these were seventh graders, so they could handle this little prank.  For a few seconds, the look in their eyes would tell me that they actually believed that I was an alien, and then we would all crack up laughing and go on with our lives.  Check out our TpT unit for “The Monsters Are Due on Maple Street” if you need more standards-based activities.
  • “Sorry, Wrong Number” and “The Hitchhiker,” both by Lucille Fletcher are also great plays that would serve as perfect spooky middle school ELA Halloween lessons!
  • “Duffy’s Jacket” by Bruce Coville is one of the BEST stories to use around Halloween. It’s the perfect length to read in one class period, and it’s one of the most suspenseful short stories for this age group. It’s about these three kids who go on a camping trip with their moms.  They end up staying in an old hunting lodge, and the moms leave the kids in the lodge one night while they go  go to town. While the kids are there alone, something comes after them.  It first shows up scratching at the door.  When we read this story, we always use sound effects of the scratch scratch scratch part. There’s also one part of the story where a door falls down, and we bang our hands on the table at that point just to watch our students jump.  At that point, they are all so into the story, they make easy targets.  The ending of this story is almost like a “gotcha” kind of thing,  so it builds tension and then has a comical ending.  Kids love it.  We have a complete teaching unit for this story too!
  • Edgar Allan Poe’s “The Tell Tale Heart”~ When I read this story, I always find a sound effect of a heart beating and press play at the times when the narrator hears the old man’s beating heart.

Whatever Halloween story that you choose, see if you can do something a little fun along with it.  I promise you, not only will your students have fun, but you will too. Teaching ELA can be so stressful at times; it’s important to have fun along with your students.  It really will help you love your job even more!   Just make sure it’s nothing too scary!

In addition to these stories, we also have plenty of fun and memorable writing activities that would be perfect for a middle school ELA Halloween lesson!  At some point in our career, we’ve completed all of these.  They’re all so great that it makes it hard to choose which one to do this Halloween! Our list is below, and we will start with a lighthearted one, one that isn’t spooky at all but involves candy! 

Perfect Writing Activities for Halloween

  • Pop Rocks Poetry ~You’ll want to teach a lesson on imagery first and provide plenty of great examples of imagery from literature.  Then, provide each student with a small bag of Pop Rocks.  Recently, we’ve found Pop Rocks at the Dollar Tree, but they are now a different brand (Hawaiian Punch).  The original ones are at Dollar General in our area, and they may be easy to find around Halloween.   Give students a “Pop Rocks Poetry” notetaking handout for them to write their descriptions on.   First, all together as a class, have students first shake the bag of Pop Rocks and listen to the sound that makes.  Have them record words that describe that sound on their hand-out.  Next, students should open the bag and smell them, and then record words that describe the smell.  Encourage them to write similes and metaphors.  After this, tell your students to put a few of the rocks in their hands and study them.  Ask students to write what they look like and feel like, providing as much detail and figurative language as possible.  Finally, have all students put a handful in their mouth all together.  Instruct them to open their mouths and be very still and quiet so that the class can listen to what it sounds like.  It’s pretty loud when everyone does this at the same time.   Record words to describe this sound on the page.  Finally, have them describe the taste.  Once students have all of these descriptions, instruct them to write a Pop Rocks poem, pulling in the words, descriptions, similes, and metaphors that they recorded. Our free packet contains a sample poem too!
  • Another fun poetry lesson is Halloween lunes.  Lunes are short poems that are silly. The first line has three words, the second line has five words, and the third line has three words.  One Halloween, we had our students write body part lunes.  We bought those body part gummies, the ones that have individually wrapped feet, eyeballs, ears, brains, and hands.  We gave each student one of these and then told them they had to write a lune about it.  They had a ton of fun, and loved reading them out loud!
  • Candy corn haiku are fun too!  Simply review the rules for writing haiku.  Give your students some candy corn, and have them write a few of those poems to share with their classmates. Then, let them enjoy eating the candy corn.
  • Body Beast Poetry~ Body beast as in lice, mites, bed bugs, leeches, etc.  Gross. Huh?  We know it, but our middle schoolers loved it.  This activity incorporates some research.  Students choose one body beast to research, make a list of facts, and then they have to weave at least three facts into a poem that they write about their beast.

We are so happy to have you here reading our blog!  We want to say thank you by providing you with this FREE resource that will give you all of the printables that you need for lunes, Pop Rock poetry, body beast poetry, candy corn haiku, and even a few others.  We’d love for you to follow us on TpT, Instagram, Facebook, and of course our Podcast, which is titled Two Middle School ELA Teachers.  

One more thing…(We’ve been teaching so long, we just have soooo many things to share!)  Another way that you can spend Halloween class time is with an episode of The Twilight Zone. In fact, “The Monsters are Due on Maple Street”  mentioned earlier is a Twilight Zone episode.   That show was popular when we were kids, but the episodes are now on Netflix.  We’ve created a wealth of resources to accompany four different episodes, and these are all seriously standards based… Students will write objective summaries, determine themes, and more.  You can check out our Twilight Zone bundle in our TpT store if you’d like by clicking here.  Oh, and one other resource we have that would make the perfect middle school ELA Halloween lesson is our Dead Verbs funeral activity!  This is a great lesson to teach students the importance of word choice! 

I think that’s about it.  It looks like Halloween Day is on a school day for most this year!  We hope you have a spooktacular time in your own ELA class this year for Halloween!  

Narrative Writing for Middle School ELA – Development of a Theme

During the first nine weeks, we cover narrative writing.  This is a way to teach standards like how to develop a theme.  We use quick narrative writing assignments simply because we have SO much to teach.  Teaching narrative writing makes sense for us to do in the first nine weeks because we read a lot of short stories and can peek at how authors of these stories develop their theme.  during this time.  If you’re interested in seeing what we do for the first nine weeks of school and how we fit everything in, we have a free resource in our TpT store called 7th Grade ELA, a Glimpse into our Yearly Plans, that maps it all out and even gives helpful links that  you can use.  

Now, let’s get started on this quick narrative writing lesson!

What standards will you cover?

One of the standards for sixth, seventh, and eighth grades is for students to analyze the development of theme.  The narrative writing exercise we are going to tell you about today will cover that standard while at the same time provide a creative and fun narrative writing opportunity.  

Here’s what you do! Put your students in small groups – three works best. Give each group a theme statement.  Tell them that their job is to write a quick story that teaches that theme.  Before writing, they need to do some planning.  They will ask themselves questions about the characters, setting, and plot.

In order to create this theme, who should my characters be?  What type of personalities should they have?  What should their flaws be?  Their strengths?

Where should this story take place in order for readers to conclude the theme?

What should be the main conflict?  How should the story begin?   What will be the turning point of the story?  How will we end it?

Once students have done their planning, they should write their quick story.  Make sure students understand that this story is just a writing exercise, so it doesn’t have to be perfect.  Their job is to quickly write a story, developing the theme they were given. 

After writing the story, give students some questions to think through HOW they developed their theme.  Why did you choose the characters you did?  What did you use the most to develop the theme?   Did the setting contribute to the theme or could the story take place somewhere else?

After the stories are written…more look more at how the theme was developed

When time is up, take up each groups’ story.   Give each group a copy of all of the theme statements, each one labeled with a number   Read each story out loud, one by one, and have the class guess which theme belongs to that story by matching the number corresponding to the theme statement to the story.  

Once the students have had time to choose the theme, reveal the true theme statement that the group was assigned.  Then, engage the group who wrote the story in explaining how they developed the theme.

Some things to help you use this activity today…

This is a list of theme statements that you can use. 

We also have a product in our TpT store that includes a PowerPoint to teach theme and development, handouts for the students, and even a poem with a prompt for analyzing the development of theme in it.  There is even a sample essay included.  And, it of course all of the things we talked about!   A meaningful and engaging way to allow your students to understand the ways authors develop theme is now at your fingertips!

Happy teaching!


Strong Verb Paragraphs ~ Effective Narrative Writing Exercise for Middle School ELA

Sometimes, we need short writing assignments, rather than long ones to fit everything into our ELA class time.  Writing strong verb paragraphs is an effective narrative writing exercise for middle school ELA because it is quick and fun.  As ELA teachers, we have so much to cover each nine weeks.  It seems impossible to have students write narratives, poems, arguments, as well as expository and informative pieces, which are all part of the ELA standards.    

Tammy and I have been teaching for a long time, and while we certainly don’t know it all, we have figured out a few things.  One way that we cover the writing standards is by adding short and fun writing exercises, like strong verb paragraphs. 

What are strong verb paragraphs?

Strong verb paragraphs are paragraphs that consist of seven sentences that only allow strong verbs in the middle five sentences.  Students can write these paragraphs independently or with a partner.  Along with an interesting narrative prompt, provide students with the following rules.

  1. Write a paragraph that has seven sentences.
  2. Only your first and last sentences can have helping verbs or a linking verb in them. The other sentences must have strong action verbs.
  3. Choose the most vivid verbs, ones that help your reader picture something. You may use the list of helping verbs to help you avoid them.
  4. Underline the verb in each sentence.
  5. Do not repeat any action verbs in your paragraph. In other words, each sentence needs to have its own original verb.
  6. Read back over your paragraph to make sure you do not have any fragments or run-on sentences.

It is helpful to provide students with a list of helping verbs and linking verbs.  Also, before allowing students to jump in and write their own strong verb paragraph, provide them with a good example. You can even write one together as a class first!

Why have your students write strong verb paragraphs?

This exercise teaches students to choose their words wisely, essentially making them better writers for life! Writing the paragraphs takes one class period, instead of weeks, making this the perfect writing exercise for middle school ELA classes.  What makes these fun are the prompts that you provide and the challenge to complete it correctly.   At first, your students may find it hard to write sentences without linking verbs or helping verbs, but encourage them that as they practice, they will get better.   Another thing that makes this exercise fun is that kids usually love hearing their paragraph read aloud. They will beam with pride as their story is read aloud and usually laugh at all of the funny sentences that their classmates wrote too.   Here are some sample narrative prompts for strong verb paragraphs:

  • Write a paragraph telling about a time an alien visited our school.
  • Write a paragraph telling about a time a food fight broke out in the lunchroom.
  • Write a paragraph telling about a time a group of kids spent the night in a haunted house.

Before Writing the Paragraphs, Begin with Sentences

Before your students write strong verb paragraphs, you may want to begin with sentences.  Present students with sentences that have a verb that isn’t specific and then read another sentence with a strong action verb that can be visualized.  Look at the following examples:

Suddenly, my dog, Meatball, ran through the living room. 

Suddenly, my dog, Meatball, bulldozed through the living room.

 I made my way through the sea of people to take a better look. 

I wormed my way through the sea of people to take a better look.

The next step is to teach students to take sentences that have linking verbs that tell and not show and teach them to transform those sentences into sentences that show instead of tell.  Turning sentences with linking verbs into sentences with action verbs is a little bit harder, but once students see examples and watch you brainstorm and model how to do this, they will feel confident in crafting these sentences themselves.

Take a look at the following examples:

Example sentence with a linking verb that tellsHe was mad.

To guide students in revising this sentence, ask students what actions mad people do.  Make a list of these actions, and then rewrite the sentence replacing the linking verb was with these words.

He slammed his book down on the desk, stomped across the room, and slammed the door on his way out. 

Explain to the class that with this sentence, you don’t have to tell that the boy was mad.  We know it based on his actions.  The sentence with the strong verbs shows instead of tells!

Here’s another example:

The troll was ugly.

The ugly troll’s green teeth jutted out over his long, flaky chin. The warts on his nose multiplied by the hour, and his razor-sharp toenails scraped the ground when he walked.

After these whole class and individual practices with sentences, you’ll be ready for the strong verb paragraphs.  Consider writing one as a whole class together first, then assigning one to a small group or to students working with a partner.

Click here to grab a printable copy of the strong verb paragraph rules.  If you want a complete resource, complete with a presentation for teaching, strong verb mini lessons, printable strong verb prompts, and example paragraphs, check out our Strong Verb Paragraph resource on TpT.

We use strong verb paragraphs during the first nine weeks.  If you would like to see exactly what we teach in the first nine weeks, click here to download our free first nine weeks plans.  If you’d like to see our yearly plans, click here to download a glimpse into our 7th grade ELA yearly plans.

If you’re looking for an effective process-approach method to teach your students to write text dependent analysis essays, we have a complete course, complete with instructional videos for you and EVERYTHING needed to teach the entire process to your middle schoolers.  Click here to enroll in the first section of the course completely free!   If you like the free course, consider asking your administration to purchase the complete course.

Organizational Tips for Teachers to Save Your Sanity

As a teacher, you know that organization is not just important. It is essential!   We have two organizational tips for teachers to save your sanity.  We have used these for years, and they work!

Our first organizational tip for teachers is to color code supplies in your classroom.

We color code just about everything in our classrooms, and it starts with folders that our students use for bell work. If you don’t use bell work, it is a lifesaver when it comes to classroom management, check out our blog post or podcast episode five where we talk about the bell work we use.

In our middle school ELA classrooms, we use two bell ringers, Core Chomp and Daily Grammar Minutes.  As our students enter our classrooms, they pick up their folder that houses their bell work papers. We don’t let our students take this work out of the classroom because we have found that this prevents issues with students losing them or forgetting them, and this is where our first color coding comes in to play.   We color code these folders, using green for  first period and red for last period because green means go and red means stop, of course.  For our other classes, we use blue or yellow. Organizing these folders by color makes it visually simple to grab a class set and give out the right ones, espeically if you teach multiple classes in a day. Using primary colors is what works for us because those colors are easy to find. 

In addition to our students’ color-coded folders, we  have our own teacher color-coded folders for each class too.  In our green teacher folders, we keep the bell work that we use to go over it for first period daily as well as a copy of the key and any other papers needed  that day for that period. 

Our classroom labels are color coded as well.  For example, drawers used for students to turn papers in are labeled with green, blue, yellow and red. In Google Drive, a color-coded folder is used for each class.  This is great for saving emails, spreadsheets, or anything related to a student in a certain class.  

 Even paper clips can become a color-coded organizational tool. If the office gives you papers that need to be given out first period, grab a green paper clip. You can use a paper clip or a magnetic bookmark to mark the pages in your class novels. If you are like us, each period does not get to the same place in the novel that you’re reading. So, for example, if first period ends on page 20, and third period ends on page 25, mark those pages with a green clip for first and a yellow one for third! The next day, you know where to begin.  

Color coding works! 


Our second organizational tip for teachers is to use Popsicle (craft) Sticks, color-coded of course!

If you are not using popsicle sticks in your classroom, trust us on this, you should! They are simple and effective.  There are a lot of digital options available for calling on students, and we have tried those, but we always return to our faithful popsicle sticks.  These sticks are super simple to use and work for so many things you do daily in the classroom.  You can find a pack of multicolored Popsicle sticks at Walmart or a craft store.  Simply write each students name with a Sharpie on both sides of the sticks, and you’re set for the year.  Along with everythibng else, we color code our sticks as well.  First period gets the green sticks.  Last period gets the red ones, and the classes in between are assigned blue and yellow.  When we are ready to go over bellwork in first period, we grab the green sticks, and begin calling on students.  

Popsicle sticks can be used in many ways.  In addition to calling on students, here are a few more ways to use them. 

  • For rewards, you can pick a popsicle stick to give a quick treat to a student who is on task. This means a lot to the kids, and it is fast and random. It’s a great motivational tool for keeping kids focused and on task.  Also, if you are working through a lesson, you could ask a question and say “Okay, I’m going to pull a stick. If you get this right, you’ll earn a high-five or a piece of candy.”
  • Use Popsicle sticks when you need a student to run an errand. If you need a kid to go to the office, of course they all will want to go. Pulling a stick makes the choice random and quick.
  • Use popsicle sticks to call on students whenever you want them to answer.  We use the sticks everyday as we go over the answers for bell work, but we also use them throughout the class for other questions.  This helps us to call on everyone, not just students with their hands up. Calling on kids in this way keeps students engaged; they never know when it will be “their turn” to provide an answer.
  • Use sticks to keep up with absences.  As we use the sticks to call on students for bell work, we keep a separate “pile” for anyone who is absent.  This is a visual cue for us to take attendance and to sort any work that will need to be made-up.
  • Use popsicle sticks to group students. Sometimes, you have to plan your groups ahead of time strategically and decide who needs to be with who.  But there are other times you just want to quickly group students. So if you need to put students in groups really fast, you can say,  “All right, we’re going to use popsicle sticks. Stop telling me who you want to be with because I’m in charge of this.” Then, just pull sticks and lay them out to create groups. With a glance, you can switch them around as needed, and your groups are done!  It’s a super easy and fast way to put kids in groups.
  • Use the sticks to tell students where to go in the classroom. We have “special spots” that students enjoy using. For example, Shannon has an area that has carpet and cool little chairs where students all want to do group work. So to make it fair, she says, “Alright, I’m pulling a stick, and that person’s group gets to work on the carpet today.”

Popsicle sticks just work, and color coding them makes things easy!