We will share everything from classroom management tips to technology that works for us in these blog posts. If it is something to help teachers, we will share it!

Three Reasons Using Bell Ringers in the Middle School ELA Classroom Makes Sense

We want to share with you three reasons you should use bell ringers in the middle school ELA classroom! First of all, what are bell ringers?  Some people call these “warm-ups” or “Do-Now,” but essentially, a bell ringer is a short assignment that students complete as soon as they enter the classroom each day.  After a few minutes of working, the teacher goes over that day’s assignment, allowing students to change their answers if they got them wrong. 

The first reason you should use bell ringers in the middle school ELA classroom is because they provide a routine for students. With a bell ringer in place, your class will begin with a focused structure each and every day, and with this structure in place, problems with downtime will be avoided. Students will know to enter the classroom, sit down, and begin working on that bell ringer right away, which helps eliminate behavior problems.    It is best to require students to be quiet when they enter and start their bell work so that everyone can concentrate and think because we all know how much energy it requires to quiet a classroom full of middle schoolers.  If you start that expectation early in the year, it will save you time, energy, and sanity!   With this routine in place, even when you have a substitute, students will know what to do when they enter the room. 


Organization of Bell Work

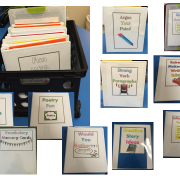
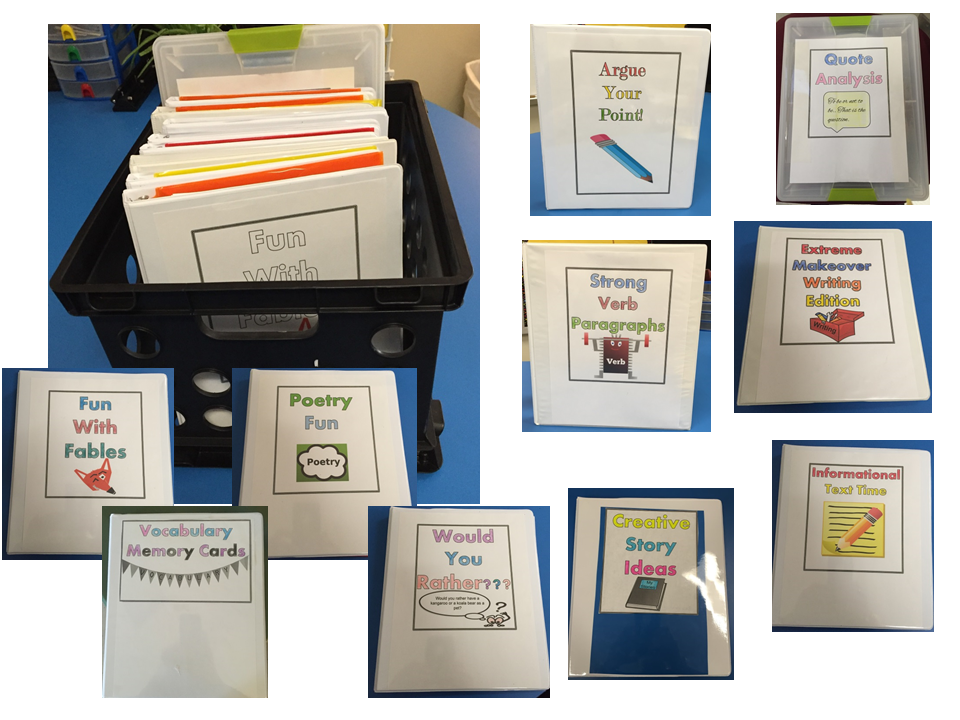
 We keep our bell work in folders that stay in our classrooms.  This eliminates problems because students won’t lose them.   There are benefits to digital bellwork, but for us, we prefer to use the paper and pencil type.  This way, we don’t have to worry about a device not being charged or a student not having a device. We don’t have to wait for chromebooks to turn on either.  It’s simply come in, grab the folder, and begin working. 

We copy eight bell ringers to a page, front and back, so that we’re not making copies every day. Once that eight are completed, we take that page up and grade one day’s bell work at random.  We tell our students, “You never know which one we’re going to grade so you better pay attention when we go over the answers.” Spot checking like this saves us time, and it ensures that students pay attention when going over it, and all students love the fact that they can earn an easy 100 each time the bell work is graded.


 The second reason that bell ringers make sense in middle school ELA is because, if used strategically, standards can be spiraled in small pieces every day. There are a lot of bell ringers out there, ones that are fun and cute and full of fluff, but the ones that we use stick to the standards and spiral them throughout the year.   One bell ringer that we use is Core Chomp. We created this bell ringer knowing that we would need to hit standards over and over for our middle school students to truly learn. We named this bell ringer Core Chomp because each day the quick assignment takes a small bite, if you will, out of the Common Core State Standards.  Every chomp includes a few questions to answer, and they also include reading passages from stories, poems, and informational texts.  We built our Core Chomp around a rotating five-day pattern. Students  read a poem on day one, a complex fiction passage on day two, and an informational text on day three. Days four and five address writing, research, and language.  We designed the exercises in Core Chomp so that by the end of the year, students will have read, comprehended, and been asked to provide evidence of their analysis of a wide variety of literature and informational texts. In addition, we created this resource so that students would spend time thinking through the writing and research process.


The third reason why you should use bell ringers in your ELA classroom is because it helps you fit it all in. We all know as English teachers that there is so much that we are required to teach our students, and that’s why we use two bell ringers each and every day.  The second bell ringer we use is called Daily Grammar Minutes, and it helps us teach the language standards.  If you teach grammar in bite sized, bellringer form, you can hold students’ attention.  With our grammar bell ringer, we start with the basics and build from there.  One of the seventh grade language standards is that students have to know is the functions of phrases and clauses and types of sentences. Students can’t jump in and do that standard until they know so many prerequisites. They have to know what the subject is, what a verb is, what phrases and clauses are.  And, I don’t know about your students, but ours don’t come to us knowing or remembering those things.   Daily Grammar Minutes takes a spiraling approach to teaching grammar, and it incorporates easy-to-learn language that students can understand.  In fact, many new teachers have used this resource and commented that this is how they learned grammar themselves.  The easy to understand lessons and repetitive practice helped them learn right along with the students.  


How Much Time Does Bell Work Take?

People always ask,”How much time do you spend doing bell ringers?”   At our school, our teachers use Core Chomp and Daily Grammar Minutes in the sixth, seventh, and eighth grade. So, for our eighth graders, students are used to the routine, and it goes quicker. But if you’re new to using these bell ringers,  it will take between 10 to 15 minutes, some days less.  If you wanted to use Core Chomp alone, it could take from five to ten minutes. Of course, as students work, you can walk around the room to make sure they are working and to help them if needed.  

Even if you don’t use our bell ringers, we strongly suggest that you go find one that you like and that you feel good about covering the standards. If you’re interested in Core Chomp and Daily Grammar Minutes, the best way to see if they will work for you is to try them for a few days in your classroom.  Click the links below to download ten free Core Chomps for each grade. We are also including  a sample of our Daily Grammar Minutes.  

Sixth Grade Core Chomp Sample                                                 Sixth Grade Daily Grammar Minutes Sample

Seventh Grade Core Chomp Sample 

Eighth Grade Core Chomp Sample

Make Grading Easy in the ELA Classroom

Four Tips to Make Grading Easy in the ELA Classroom

There’s so much to do in ELA, as you know, and that means a lot to grade! In order to make our lives simpler and to stay sane in the process, we have to find ways to make grading easy in the ELA classroom.  This means working smarter, not harder.  

1.  Use Google Forms

Make Grading Easier in the ELA classroom by Using Google Forms or another self-grading platform.  Google Forms saves so much time. You can use a Google form for an exit ticket, to find out how your kids are feeling about something that you’ve just covered, to replace worksheets, or for tests.  A lot of times teachers feel like Google Forms is only reserved for tests, but it’s not.  There is no reason not to use Google Forms, especially because it saves you precious time grading, time that can be spent planning more effective lessons!

2.  Don’t Be Afraid to Give Everyone a 100 on an Assignment

The second tip for making grading easy in the ELA classroom is not to be afraid to give everybody 100 at times.  When you give an assignment, and you’re walking around the room, watching your students work and know they’re working hard, you see what they’re doing the entire time. They may turn in something to you when they’re done, but since you have monitored the process the entire time, and you know everybody worked hard, don’t spend your time going through grading; just put the 100 in the gradebook, stamp that 100 on their paper, give it back, and be done.  If there are one or two students who you know did not work hard, grade only those.

3.  Grade Writing as a Process

When it comes to grading writing, keep in mind that it is a process that you must teach.  You should not grade an entire essay until you have taught the entire process and practiced it.   It may be after Christmas break or even in the spring when you finally grade an entire essay using the writing rubric, and that is fine. In the meantime, grade only what you have covered in a mini lesson. For example, your mini lesson might be on writing grabbers or hooks in introductions. Even though your students might write an entire essay, you’re only going to focus on those first few sentences because you’re only grading their hook.  This saves you time, and it focuses your energy and gives the kids meaningful feedback for what they have covered right then in class. Also, don’t be afraid to teach writing using a process approach.  Teach  introductions, and then only write introductions for a while.  Don’t even have them write the body of the essay. That way, when you grade those, you’re only grading that small portion.  Once students have mastered introductions, have them write an introduction and only one body paragraph.  When they’re done, you only have two paragraphs to grade instead of an entire essay.  

Using Google Docs in Google Classroom can also save you a ton of time when you’re grading writing.  When you assign an essay, attach a blank Google Doc to your assignment in Google Classroom.  Once students start writing, use your computer to go in and watch them write.  You can go from paper to paper and watch students type in real time.  This allows you to move quickly as you monitor what you have taught them.  If you see a student who is lost or off track, you can go straight to their desk to help them, or type them a comment right in the Google Doc and then move on.  This saves time in grading too because if you’ve helped with the process as they are writing and read each student’s introduction as they go, you can put that 100 in the gradebook immediately because you know what they’ve done.  There will be no reason to go back through and grade anything. 

When it does come time for you to grade an entire essay, there is a feature on Google Docs where you can add a rubric. This is very efficient because you can create a rubric and then reuse that same rubric again when you assign another essay. Plus, using a rubric allows you to speed up the grading process.  To set up this rubric,  go to your Classwork page on your Google Classroom. Find the assignment that you’ve already created. Click the three dots to the right beside the assignment, and click Edit. Then you’ll see the choice to create a rubric.  Click Create Rubric and put in your categories to be graded. For example, you might put introduction worth 20 points, body paragraph 1 20 points, body paragraph 2 20 points, body paragraph 3 20 points, and conclusion 20 points. After setting up the rubric, when you click on each student’s essay, you will see this rubric to the right of the Google Doc.  You can fill in their points, and when you return it, the students can see where they received their points and where they missed points. Creating a rubric in Google Docs is a wonderful way to save you some time.

4.  Use Spot Checking Instead of Grading Everything

 Spot checking is another easy way to make grading easy in the ELA classroom. Spot checking simply means grading a potion of something rather than the whole thing.  We use this method with our bell work.  We use Core Chomp as bell work every day.  We copy eight Core Chomps on the front and back of one page, and when all eight are complete, we take up the page to grade.   Instead of grading all eight, we choose one on that page to grade.  The one we choose is at random, whichever we feel like grading when we sit down.  Grading one at random keeps students on their toes because they never know which one will be graded. Since we have gone over the answers to the bell work each day, this is the perfect grading method to use because if students were paying attention, they should all make a 100.  Spot checking can be used with journal writing or really any activity that you do. Anytime you have students working on a big task, instead of grading all 10 of the activities, grade one portion of it at random. 

5 Ways to Ruin Your Middle School Classroom Climate

Classroom climate is really important, and especially in the middle school.  We want our classes and our classrooms to feel safe, to feel engaging, respectful, welcoming, and supportive.   In order to highlight what it takes to create this type of environment, we want to discuss five ways to ruin your middle school classroom climate.

1.  The first way to ruin your middle school classroom climate is to nitpick your students. 
Another way of describing nitpicking is “fault finding”.   Teachers do this when trying to catch their students doing something they shouldn’t, or looking for any little thing to stay on them about.   Instead of staying on students about every little thing, we need to be mindful of watching for students doing the right things.  We certainly have to address issues in the classroom, and there are times when we need to say something to a student for doing something that is distracting to others, but we can say or do something in a way that doesn’t come across as “nitpicky”.  Imagine a kid who is tapping his pencil all the time and about to drive you crazy.  If you look at him every five minutes and say, “Stop tapping your pencil!” he may end up doing it more and more.  Imagine instead of telling him to stop, you say, “Put that pencil in your desk for now.”  This way, his behavior is redirected and changed completely. Later on, when you can talk one on one with that kid, say, “Thanks for putting that pencil up when I asked you to.”

At other times, just ignore it. You’ll be surprised at how this will create such a better atmosphere than staying on kids about small things.  We really have to pick our battles.  We don’t want to let the small stuff become the only stuff.  Sometimes, teachers too easily make small things their focus.  If a kid doesn’t have a pencil, just give him/her one.  Don’t make a big deal out things like this that can be easily solved.


2.  The second way to ruin your middle school classroom climate is to handle problems in front of your entire class.

We all know that handling a problem with a student in front of an audience does not work. We don’t want to call a student out in front of everyone because that student may retaliate. Then, you may retaliate, and before you know it, you’ve got a battle going on in front of everyone. There are better ways to handle a student who is causing problems.  For example, if there’s a kid who’s talking when he/she shouldn’t be, I might just look at that student, put my finger to my lips with my teacher-look that means business.  I might walk over there and just simply put my hand on the desk, and that takes care of it.   We also don’t want to use sarcasm. Sarcasm makes kids shut down. It makes them feel stupid.


3.  The third way to ruin your middle school classroom climate is to keep your class boring and “stiff”. 
If you want to ruin your middle school classroom climate, keep it boring. Do the same thing day in day out for the entire school year. That’s going to create a place where your students don’t want to be. For your classroom to be positive, you want them to be there, to look forward to coming to your room. Think about times when you can add games so that the kids get excited and pay better attention. Some of the ones online right now that are so fun for the kids include Gimkit, quizzizz, Blooket.  If you haven’t yet, check those out.  You can get a free account for those.
Learning platforms like Nearpod, where you can make sure all of your students are engaged are also great for your classroom climate. Nearpod allows you to see all of your students’ responses in real time and allows you to incorporate fun activities in a lesson.  If you’ve never tried using Nearpod, I encourage you to do so.  It is a game changer when it comes to teaching and keeping students engaged!

Other ways to avoid monotony in your classroom are to incorporate storytelling into your lessons, let students work with partners and in groups, use videos, bring in humor every single day. Take the time for a few minutes to focus on a funny thing that a you or a kid did or said. And just for a few minutes in that instant, you’ve made your classroom happy. You’ve brought that little bit of joy in there, and it makes your kids want to be in your classroom.  Just make sure to change things up from time to time.

Watch out for your class feeling too “stiff” as well.  Sometimes we feel that in order to have good classroom management, our students have to be silent, sitting face forward with their hands folded nicely on the desk.  We sometimes need to lighten the mood in the room, not too much, because that can lead to a chaotic environment, but just enough so that it is a fun, positive place for students to learn.   Little things like giving a student a high five when he/she does something good, or having another student give that high five. Or if a kid sneezes, say bless you.  Even that simple little gesture can lighten the climate of a classroom.


4.  The fourth way to ruin your middle school classroom climate is to yell at your students and give them commands without explanations. 

Yelling is not effective in today’s classroom.   It’s just not worth it.  Use a firm “I mean business voice” when you need to, but don’t yell.  Also, when we give commands to our students, it is so helpful to tell them why we want them to do what we’re asking them to do.   You will be so surprised at how much better a student will respond to what you need them to do if you give an explanation for it.  For example, I could say “I need you to be quiet.”   Or I could say, “I need you to be quiet because we’re about to read. And when I read, if somebody is talking, I can’t concentrate, and I keep rereading the first sentence over and over again.”  I promise that students will respond better when they have that explanation.

Another tip I’m going to throw in here, because I’ve found it really works, is to change up the way you ask students to be quiet or to sit down or whatever you need them to do.  Students hear the same thing all day long from all of their teacher.  They constantly hear “Be quiet.”  “Stop talking.”  They hear these so much that they sometimes stop paying attention to them.  If you can change the way that you say those things, they will listen and respond better.  Here’s an example. Instead of saying, “Stop talking,” try this. “If you’re talking… stop.” Then follow it up with your reason behind it.  “If you’re standing, I need you to have a seat because I’m about to give you some instructions, and I want all eyes on me.”   You’re going to be amazed at the difference that will make.


5.  The fifth way to ruin your middle school classroom climate is to show no interest in who your students are as people.  
The last, and probably the main way that you can ruin your middle school classroom environment is to show no interest in who your students are as people. It’s important to become interested in things your students are interested in.  It’s important  for your students to know that you are an adult that they can come to if they have a problem.

  • Set up T-Mail in Your Classroom

One simple thing you can do is to set up a T mail (not e-mail) station in your classroom.  T-mail stands for Teacher Mail.  Make a space in your classroom for a  basket or a box where your students can drop you a note.  Just make sure other students don’t have access to it.  You could also do this digitally using a Google Form or Google Doc once a week or month, or however often you wanted to.   Take the time to read these notes and respond to them. So many kids are just so shy and timid that they’re never going to say anything to you, especially in front of anybody. But when you have that place set up… that safe place, they’re going to feel comfortable in even asking a question about content. This also provides a way that they can talk to you about some of the students who may be bothering them in your middle school class; something you haven’t noticed.  Sometimes students need our help, and they’re not sure how to get it. T-mail provides an easy and non-threatening way.   This will do wonders for your classroom climate because it will show your students that you see them as people, and in turn, they will see you as a person…one who cares!

  • Making speaking personally to each student intentional

Another thing you can do is to  get a calendar, and each school day on that calendar for that month, write a different student’s name. On that day, that name will remind you to go speak to that kid personally and ask them something about his/her life, something like, “How’d you do in your game last night?” or “Do you have any brothers and sisters?”

  • Use the Ten-Two Strategy

Or you can do something called the 10 to 2 strategy.  This is especially beneficial for any student that you’re having trouble with in class.  Here’s how it works.   For 10 days, spend two minutes with that student one on one, asking him/her questions or talking to him/her about things that he/she is interested in. That’s why it’s called 10 to 2.  Ten days, two minutes. You will notice a tremendous difference in that student’s attitude and behavior because he/she is going to realize that you really care about them as a person.

  • Start a “Secret Shout-Out Program”

And one last thing you can do is to have a year-long “Secret Shout-Out” program with your students. This is somewhat like Secret Santa. Each student is assigned to another student in the class, and they are responsible for providing secret shout outs throughout the month or throughout the nine weeks. Provide notecards to students and tell them to write compliments or quotes to inspire their secret shout out person.   They turn these cards into you, and you will deliver those, keeping everything anonymous. Stress that students should keep it a secret. This is really a wonderful thing to do to build your classroom climate because kids love getting these, and they enjoy making cards for others as well. They will always look forward to receiving their personal “shout out”!

Four First Day Activities for Middle School ELA

Ahhhh, the first day of school.  No matter how long you teach, it seems that there can still be anxiety of what to do on that day.  We want to share four first day activities for middle school ELA that you will love! We’ll cover what students should do when they enter your room, the rules that we have found work all year, exciting icebreakers that you can use, and even a lesson to begin on that very first day.

First Day Activities for Middle School ELA  ~ Students Entering the Classroom

To begin with, we make sure we’re standing at the door so that we can greet students as they enter.  This is one of the important first day activities for middle school ELA to ensure success.  As students enter, we tell them to look on the screen in the front of the classroom.  On the screen, we have  directions telling students what to do.  First on the list is how to find their seats.  We have their names on their desks and use alphabetical order until can can learn names.  We are firm believers in having a seating chart for the first day. It actually makes your students feel more comfortable because they don’t have to worry about things like who am I going to sit next to or who’s in this class. We’re from the generation of Harry Wong, The First Days of School. If you’ve never looked at that book, you might want to check it out on Amazon. He believes in seating charts. We start that from day one.  Also on the list displayed on the screen, we tell them to begin working on the bell ringer that we already have on their desks.  The last direction displayed is for students to remain silent as they work.  We make sure we have pencils provided.

First Day Activities for Middle School ELA  ~ Bell Ringers

A Bell ringer on day one is an important first day activity for middle school ELA.  We start with “paper and pencil” copies because we don’t know things such as who has a device or who’s new to the school.  The screen instructs them to start the work on their desk. That work is the very first bell ringer. In the past, we used longer, more traditional student surveys when students first entered, and we ran out of time.  We break that long survey down into small pieces, and they make up several days of bell ringers. By providing an interest inventory in small bites in bell ringer fashion, we can get to know our students while they’re learning the routines of our classroom at the same time.  Our back to school bell ringers have one “fun” would you rather question. For example, the bellringer asks students if they would rather be invisible or to have the power to read people’s minds.  This “fun” question helps create the climate from day one; your kids will enjoy it. We even ask for a few volunteers to tell us why they made their selection. It both relaxes the atmosphere, and it really gets them in the practice of coming in and immediately focusing on the bell ringer.  Plus, students are tired of back to school surveys.  They usually do them in every class on that first day.  By breaking up this activity into bell ringers, students aren’t presented with the monotonous in your room.

Click here to download these first week bell ringers!

First Day Activities for Middle School ELA  ~ Rules

Our second tip for first day activities for middle school ELA is to go over the rules and procedures. Once the bell ringer is complete, and we’ve spent a little bit of time going over it, we go over our rules for the year. We have been teaching for a while, and we can remember years where we had a list of ten rules.  It was just too many. We’ve narrowed our rules to four; they are the ones we use every single year. And in fact, everyone on our team at school has adopted these rules because they really just cover everything.  It’s best to keep them simple. And so our classroom rules are the following:

  • Respect others.
  • Be on task at all times.
  • Don’t talk during instruction time or during announcements.
  • Stay seated during instruction time.

And that’s it. We do spend a little bit of time elaborating on each one of those; especially number one – respect others.  We have a discussion about what it looks like to respect the teacher, what it looks like to respect our classmates, even what it looks like to respect ourselves.

Click here to download a list of these rules.

First Day Activities for Middle School ELA  ~ Procedures

Procedures are different from rules. Every teacher has a way that he/she wants things done in his/her classroom. For example, every teacher wants papers passed in a certain way.  So you want to spend a little bit of time going over some of the major procedures in your classroom. You don’t have to do all of them on the first da.  The main thing is to know that going over procedures is one of the important first day activities for middle school ELA.

Stations

One procedure we go over in our first day activities for middle school ELA is our stations. These stations are just a set of drawers. Sterilite makes the ones we use. In each drawer, we have things that students may need during a class period. Since these items are there at their fingertips, students don’t have to get up. If they don’t have a pencil that day, they don’t have to involve us in that.  Our students simply open the pencil drawer, and they get a pencil out. This is the same for tissue, hand sanitizer, highlighters, and anything they need daily. If you’re reading a novel, the novels are in the station. So the students have everything they need at their desk. And there’s no need to ask where something is; they know since you go through this procedure from the beginning.  We cannot tell you how much this helps with classroom management. When kids are getting out of their seats, especially middle school kids, they’re not simply going to the pencil sharpener.  They’re going to also hit someone on the head or neck. It’s just the nature of who they are. But this eliminates them having to get up so much.  Stations eliminate a lot of problems.

Bathroom

It is important to decide how you will handle students needing to go to the bathroom.  One thing that we started doing in our school last year is when a student goes to the bathroom, their phone stays in the classroom. It can be placed in a basket, a pocket chart, or it can just be placed facedown on the teacher’s desk. Another thing we have found that works is using bathroom passes.  We give each student four passes for a nine weeks. We use a Google Form for that because the Google Form is a record. It has a timestamp, and you can print that  spreadsheet  if you need to have any documentation for administration. The bathroom is just a situation, and you have to come up with a procedure that works for you. Be sure to consider school requirements when deciding on your bathroom procedure as one of your first day activities for middle school ELA.

Icebreakers

First day activities for middle school ELA need to include a little bit of fun. And so we’re going to share with you two icebreakers that you can use on that first day back. You probably won’t have time to do both of these, but you can choose your your favorite one and do it.

Classmate Bingo

We give the students a bingo card, and they walk around the room asking their classmates questions based on the card. And when they find a classmate that matches that square, the classmate initials it.  For example, one square has them find a student who talks in their sleep. This really gets the students engaged. But again, they’re up with a purpose, and they’re up with something in their hands. So they have a task to complete. You can set a timer and give a challenge to find a certain number of initials in a certain number of squares.  We have a copy of a bingo card we use for you!

Click here to download the Bingo card for Classmate Bingo.

Nearpod

If you’ve never used Nearpod, you need to check it out because it is a game changer when it comes to teaching. You can sign up for a free account. We found this icebreaker on Nearpod, but you don’t necessarily have to use Nearpod to complete this icebreaker.  This is how the icebreaker goes. You tell students, “I want you to think of an object that begins with the same letter as your last name, and write that object down.”  Once they’ve done that, you put the students with a partner; the two partners have to combine those two objects to invent something new. And then you can have them draw a picture and write a description and let them just be really creative.  Finally, have them share their new invention with the class.  Kids love this!  If you’re looking for this activity on Nearpod, it’s called “1+1=!1”   Here is an example.  If the first partner’s last name, began with the letter L, they might write down the object leaf. And then the second partner whose last name started with a letter B might write down the word bouquet. So when they get together, they have the words leaf bouquet. And now they have to come up with an invention using these words. So they might say, “okay, leaf bouquet. This could be a Mother’s Day gift for elephants.”

Poetry Activity

One of our FAVORITE first day activities for middle school ELA is for students to write an I Am From poem. This stems from George Ella Lyons, original I Am From poem, and you can find that on on YouTube so you can let your students listen to that. If you Google this type of poem, you can find templates. We  have students brainstorm things about their lives and things that that they remember as a child -things from their house and yard and more.  Then, they write a poem repeating the line “I am from” throughout the poem. This activity will most likely continue into the next day or days during that first week, but it is the BEST activity to start with because students enjoy it, they are proud of what they write, and it lets you start to know who they are and where they come from.

Click here to download a brainstorming form for this poem and some sample poems. 

Click here to download a list of revision tips.  Students can use these tips to revise their poems after they’ve written a first draft.

Three Tips for Middle School Back to School Open House

Tip Number One for a Middle School Back to School Open House : Use Stations!

We have found a really successful way to navigate your middle school back to school open house night. Setting up stations in your classroom that the parents and students can work through during that back to school night, adding some unique touches that will make your classroom stand out on that night, and using an ongoing slideshow during your event will make your room unforgettable as parents and students make their way through the open house.

Use Stations!

Our number one way to make your middle school back to school open house event a success is to set up stations in your classroom for the students and parents to work through when they first come in your room. You may be wondering why stations are going to be so helpful on this night.

Why Stations are Helpful

Picture it.  You just had five parents and students walk into your middle school back to school open house at the same time. They don’t have anything to do other than talk to you!  This can lead to an awkward time for parents standing around and an anxious feeling for you to hurry up and finish speaking with one parent to get to the next. Using stations can make everyone feel comfortable. It gives students and parents both a chance to see how organized you are and how happy you are to have them. Everyone will be able to see that you have taken the time to organize and set up these stations just for them. It just makes your guests feel valuable and happy to be there. Also, if parents don’t have time because they’ve got a child at another school and they’ve got to get to another open house, or they’ve got to get a child to football practice or soccer practice, the stations give them the chance to quickly be a part of the event and leave information for you.

Suggested Stations You can Implement

Stations are going to make your middle school back to school open house a game changer!  As you read these suggestions, you may start you think of other stations you could use, and that’s the beauty of this. We suggest that you have a sign at your door that parents see immediately. And that sign needs to direct them to what they should do when they walk in your room.  We have our sign say, “Parents and Students, welcome! When you come in, please look at the presentation on the screen. It will tell you what to do.”

Stations for Students

  • Station 1: One of our most successful and fun stations for students involves candy. We buy jars from The Dollar Tree. We put different types of candy in three or four jars and have the students guess how many pieces are in each jar. We provide slips of paper, and students write their name and their guess. Then between back to school night and the first day of school, you see which student had the closest guess. On the first day of school, the kids are so excited because they can’t wait to find out who will win that jar of candy.
  • Station 2: Meet the teacher. We have things set up so that our students learn a little bit about us. You could have a picture of your family, your dogs, your college diploma to let them know where you went to school, a hoodie from where you went to school, an old yearbook open to you as a middle schooler, or anything that shows the students a little bit about you to let them start to feel comfortable with you before school even starts.
  • Station 3:  About Me, the Student ~  Here, students fill out a card writing “one thing I want you as my teacher to know about me”.  This goes in a box or jar for you to read later.  On the first day of school, you already know something about each child, and you can put this to use to make your students feel welcomed.
  • Station 4:  Birthdays!  We have students can fill out a Google form that we’ll share with you, if you’d like to use it. And it lets them put their name and their birthday in a month. That’s something that gives that personal touch to the student. You can use that all year long as you make each student feel special on his/her birthday.
  • Station 5:  All for the siblings! Often times, there are younger siblings who are at the back to school open house with the parent and your student. Have a station just for them.  Consider providing a  guessing jar for these guests, some coloring pages, or fidget toys so that they’re not feeling lost. You just want your room to be as welcoming and inviting as you can for your students to make them feel loved and welcomed.

Stations for the Parents

  • Station 1: Information Station!  This is, of course, where parents can provide some of their contact information. Parents are filling out so many forms in back to school season, so you may not want to have them fill out everything. Consider using a form where you ask them the best way to contact them, whether it be through texting, emailing, or calling.
  • Station 2:  Essential Classroom Things to Know!  Here, provide handouts for parents on things you can inform them of, like your grading policy, what they can expect you to send home for homework, the main way you will communicate with them, and more.
  • Station 3: Volunteer station!  If you have a need in your classroom for parents to help you,  like field trip chaperones, supplying your classroom with tissue, or helping with PTO, this is a wonderful opportunity to have them sign up for that. We have book clubs throughout the year, and we like to give our kids a snack during book clubs because that generates excitement. During our back to school night, we have a station where parents can sign up for Book Club snacks, and that is so helpful. We go ahead and have the month that we’re going to host each book club and and let parents know that we’ll be contacting them during that month to tell them when to send the snacks.
  • Station 4:  Talk with us!  During this night, you want to speak with the kids and the parents and you can make your way around. But you definitely want to spend a few minutes talking with each person who visits your classroom.

Tip Number Two for a Middle School Back to School Open House 

Add some Unique Touches to Your Classroom!

Tip number two, for a wonderful middle school back to school open house is to add some unique touches to your classroom that parents and students don’t see in every other classroom that night. We’re so excited to tell you about the first one.

  • Unique Touch:  Let one of your stations provide a place where parents can write their child a note that you will keep and give to their child at an opportune time during the school year. Parents can write more than one note to their child if they wish. Once complete, the parents will leave the notes with you, and you will file those notes away and use them at different times throughout the school year. Of course, the easiest time is for the child’s birthday. Some parents want to write a birthday note to their child. So on that child’s birthday, you can pull out that note and give it to the child  It will really light up their day. We have found that it’s best to be careful and not make a big show of it for that student who might be new, who won’t get a note from a parent or a student whose parents couldn’t come to open house.  It’s best to give it to the student discreetly. Parents may write a note just telling their child how much they love them. And if you notice one particular day where that student seems to be feeling a little bit down, feeling not so good, you can say, “Oh, I’ve got a note for that child.” You can slip them the note from their parent and enjoy the smile that comes over that child’s face. It is just priceless, even for middle school students!   If you’re wondering how you could handle taking care of kids who don’t have notes, one suggestion is to write them a note yourself. This is really easy, again, for the birthdays, because you’ve already got their birthdays written down.
  • Unique Touch:  Using the birthdays another unique touch.  You want to celebrate your students’ birthdays throughout the year, and if you’ve got that calendar with their names on it, then you’ve got that set. To make this special during the open house event,  have a birthday poster that you can hang in your classroom.  When students write their birthday on this poster, all the students can see everyone’s birthday.  Even middle school students want everybody to know when their birthday is. They’re going to tell you “my birthdays in three days, Mrs. Temple.” So having a display will be great. There are so many different cute things on Etsy that you can display for these birthdays, or you can you can make something yourself. We’re even going to provide a display you can use too!

Tip Number Three for a Middle School Back to School Open House 

Use an Ongoing Slideshow on your TV or Screen

Our third tip is to have an ongoing slideshow that will help everything run smoothly. Use a PowerPoint or Google slides that you have on your screen at the front of the room. It will display information about who you are, your name, your classroom number, what subject you teach, as well as directions, pointing them to what they’re supposed to do while they’re there – the stations and where they go.  You can include any other information you’d like, like a quote that expresses how excited you are to have them, or a couple of pictures of yourself. And you will put that slideshow on loop so that it ongoing so that parents can always look up there to see to see that.

We are providing you with a free resource that provides printables for the stations, templates for the PowerPoints and even instructions for how to set up your stations and the supplies you’re going to need that you can pick up at the Dollar Tree.  This resource also includes some pictures from our past years of open house.

Click here to be taken to our free resource on TpT.

We are sure that your next middle school back to school open house will be a blast!  We’d love to have you connect with us. You can find us on Instagram, Facebook, and even TPT just look for ELA core plans.  You can also listen to our podcast titled Two Middle School ELA Teachers.

Text Dependent Analysis Prompt for Our Writing Test

I teach in South Carolina, and this is our first year having a text dependent analysis prompt for our writing test.  There are so many steps in teaching twelve and thirteen year old students to successfully accomplish this type of writing.

Scroll down to see our “GAME PLAN” for the test day!

tda cartoon

One of the main steps in preparing students for a text dependent analysis prompt for our writing test is to teach them the difference between analyzing and simply summarizing.  I do this early on with the help of pictures.  For example, I place a picture of a family on the screen. I then ask students to tell me what they see.  They respond by saying things like, “There are three children.”  “The house is a mess.”  “The father has a mess on the counter and flour on his face, and the mother is dressed up”.  I then tell them to analyze the picture.  What I am looking for is an answer like the following: “I think the traditional roles are reversed in this household.  It looks like the mother is going to work, and the father is a stay at home dad.  It also looks like the dad is struggling a little with the cooking and cleaning.”  I then ask this student to support his/her statement.  She does so by pointing out ways in which the picture proves what she is saying.  This is the easiest way to show what analysis is and what it is not.  Analyzing is not simply pointing out what is there.  Instead it is digging in deeper to discover something and then looking to the text to support whatever you think or believe.

Of course, this is only one small step in preparing students for a text dependent analysis prompt for our writing test.  We have a tremendous amount of other things to cover too, including simple things like how to write an introduction.  Students must know how to write a topic sentence, for example, which is a huge feat within itself!

I did want to share our “game plan” that we go over before the day of the test.  We expect all of our students to follow these steps on the day of the test.  Before they even attempt to write, they first must analyze the prompt! Below is our detailed game plan.

You can also print this text dependent analysis for our writing test game plan by clicking here!


Game Plan

  • Before reading the text, find the text dependent analysis writing prompt.  That way you will have in mind what you will have to write about before you read!
  • Read the prompt three times – YES 3 Times!!
  • Underline what it is asking you to do.
  • Pull out key words from the prompt, and think about it.  Make sure you are not missing anything!  What exactly are they telling you to do? Spend time analyzing the prompt!
  • Write your topic sentence – the one for your entire paper.  Remember, use words from the prompt to write it.
  • Now, go back and read the text.  It may be an article, a story, a poem, or two different things to read.  Annotate the text as you go – keeping in mind what you will have to write about.
  • Before writing, read your prompt again.
  • Stop and think for a few minutes.  How many paragraphs will you need?  How will you do what they are asking you to do?  Go back and look over the text thinking about what you must do.
  • Brainstorm!!! Use scratch paper to get your ideas out.  Write what the prompt is asking you to do at the top of your scratch paper.  You will need to continuously look at it to make sure you are writing about what you are supposed to write about! You can do a bubble map, a T chart, a list, or whatever helps you to get your thoughts out on paper.
  • Plan out your paragraphs with topic sentences for each and bullets for your main points. (Now you are organizing – introduction, body, conclusion)
  • Go find evidence that you can use BEFORE you write – circle it or highlight it.  You may want to write these quotes from the text on your scratch paper.  Remember, you MUST cite evidence to prove what you are saying.
  • Write a rough draft.  For the LOVE of your English teacher, make sure you CITE TEXTUAL EVIDENCE!!!!!!!!  Also, make sure you stick to your topic sentence and explain yourself.  Don’t forget to hammer the topic sentence home in the last sentence of each paragraph.
  • Revise your rough draft – Work on your word choice and make sure your essay makes sense.  Do you need to add more evidence?  Did you “Hammer home” the topic sentence by the end of each paragraph? Can you make your introduction better?  Can you improve your conclusion?
  • Edit your rough draft –Does it fit?  If not, what can you take out?  Did you capitalize the beginning of every sentence?  Look for grammar gremlins (its, it’s, etc.)  Do you have the correct punctuation at the ends of your sentences?  Do you have commas where needed?  Check your spelling.
  • Write your final draft in the text booklet. Take your time, and write as neatly as you can.  Make sure you indent.
  • Read over your final draft and make neat changes.

I wish you and your students the best of luck!  🙂

Shannon

Valentine’s Day Candy Gram Fundraiser

If you are looking for a way to make money for your school, you should definitely try a Valentine’s Day candy gram fundraiser! We make a great profit each year at our school with our cute and simple candy grams.  Each one has a poem, and students can choose to send them to their friends, teachers, or secret crush.  A week before Valentine’s Day, we provide an order form to students. Different options are provided for each candy gram (two teacher poems, two friend poems, two secret admirer poems, and two be mine poems).  We also have a generic one that just says Happy Valentine’s Day.  Each candy gram comes with candy – Blow Pop, Air Head, Hershey Kiss.  We charge $1.00 for each one, but you could charge less and still make money from your Valentine’s Day candy gram fundraiser.

At our school, each homeroom teacher is in charge of taking orders.  We make several posters to hang around the school for advertisement and to generate excitement.  We have an hour at the end of the day which we call our Accelerated Reading hour.  On Valentine’s Day or the closest school day, we will have students deliver the Candy grams during this AR period.  You may choose to have them delivered during homeroom, last period, lunch period, or whenever suits.

You will love this Valentine’s Day candy gram fundraiser, and you can use it every year!  Download our complete FREE packet here!  Enjoy!

Teach Students How to Write Topic Sentences

Over  the years, I’ve tried so many different ways to teach students how to write topic sentences. And, I’ve definitely learned that if I assume students know how to write one, I end up kicking myself for not starting with the basics!   This year, something popped in my head that seemed to help my students, so I wanted to share it.

My magic idea?  Umbrellas!

I was trying to find a way to teach students how to write a topic sentences for an introduction and topic sentences for each body paragraph in an argumentative essay when I stumbled upon the idea.  I drew a large umbrella around my topic sentence in my introduction.  I explained that everything in the paper would have to fit under this umbrella.  For the three body paragraphs, I drew smaller umbrellas.  I told students that while each body paragraph had its own topic sentence (umbrella), these three topic sentences still had to fit under the larger umbrella – topic sentence for the entire essay.  The illustration explains it better!

topic sentence umbrellas


This is basically what I said to my students to explain:  The topic sentence in the introduction is like an umbrella, a big huge one that lots of people could fit under.  You see, everything in the entire paper must fit under this big umbrella and that’s why you must choose a good one. Then, in each of the three body paragraphs, there is also a topic sentence- represented by smaller umbrellas.  Only the information in that paragraph must fit under it.  However, this umbrella still fits under the big one in the introduction.

If my big umbrella is something like “The Burmese python is a beautiful creature” then all of my small umbrellas will have to be something about what makes the snakes beautiful.  This would be hard to do.  Under my first small umbrella, I might write the following topic sentence:  The patterns on the snakes body make the Burmese python beautiful.  This works well as it fits under my big umbrella.  However, I can’t think of anything else to say under my next two umbrellas.  There is just no way I can write that many paragrraphs about why this snake is beautiful.  This means one thing, my topic sentence under my big umbrella is not a good one.  I need something else.  What if I changed it to the following: The Burmese python is an interesting creature.?  Now, i’ts much easier to come up with my smaller topic sentences for the body of my paper.  I can still use the umbrella about the snake being beautiful, but under my next umbrella, I can write the following topic sentence: The Burmese python has interesting eating habits.   Under the last umbrella, I could write the following topic sentence: The Burmese python kills its prey in a unique way.

topic sentence umbrellas mistaketopic sentence umbrellas python example

So far, this illustration I used to teach students how to write topic sentences has been wonderful!  I even brought in a big umbrella and a smaller one as an illustration.  My next idea is to look for the “umbrellas” in informational texts.  Hopefully this will help us with identifying main ideas too.

You can print all of the illustrations above by clicking here.

Happy Teaching!

Shannon

Literacy Centers in Middle School ELA

If you had asked me ten years ago if I would ever use literacy centers in middle school ELA, I would have replied, “I teach middle school, not kindergarten.”  Today, however, literacy centers in middle school ELA are all the craze, so I wanted to figure out if there was a way I could use them.

I started some online research on how teachers incorporate literacy centers in middle school ELA classrooms.  I found that many teachers  rely on centers during guided reading.  While the teacher works with small groups, the other students are using centers.  Centers are also perfect for individuals or small groups who need to be pulled by the teacher for writing instruction.  In addition, I found out that a lot of teachers simply use centers once a week or month so that students can work together and have time for hands-on, student-centered learning.  Of course, centers are perfect for early finishers too.

I was convinced that adding centers to my teaching repertoire would be a good idea, but I didn’t want activities that just provided busy work or ones that were simply fun.  I wanted centers that would challenge my students and make them better readers and writers.  After much planning, revising, and creating, I had the following tenliteracy centers in middle school ELA to try out in my room.  We spent five days rotating through them, and they were a huge hit with my students!    You can click the first one to download the complete center.

  1.  Poetry Fun
  2. Fun with Fables
  3. Informational Text Time
  4. Quote Analysis
  5. Extreme Makeover Writing Edition
  6. Strong Verb Paragraphs
  7. Argue Your Point
  8. Vocabulary Memory
  9. Would You Rather Expository Writing
  10. Creative Writing

While researching the use of centers for my classroom, I came across several ideas to house the centers.  One teacher keeps hers in bags which hang neatly in her room.  I liked the portable center plan, but I decided to house mine in three ring binders.  This way, students can grab a binder and take it to their desk or designated area to work.  All ten binders fit nicely in a crate.

lit center pictures of all notebooks and crate

As for grading the work, I decided to have students keep a “Center Portfolio”.  Each student has a three-pronged folder, and each time work from a center is complete, it goes inside this folder.  I created a checklist to be placed at the front of the folder, and students check off each center as they go.  Once a work sample is complete from ten centers, the folder is turned in for a grade.  I developed an easy checklist to help me grade the work quickly and efficiently.

I plan to add to these centers as time goes on.  The other day, I saw one of those Great American Mail Race letters in my workroom box, and I thought to myself, “This would make a great center!”  Students could respond to letters and participate in the race themselves.  I think this would make a great center because it provides an authentic writing experience.

I’m glad I’ve added these centers to my classroom.  Now that I have them created and inside the notebooks, I will have them for life!   I’ve even considered using them for emergency substitute work. One thing is for sure, my middle schoolers love to work cooperatively, and they definitely learn from one another. Centers allow this to happen!

You can create your own literacy centers for middle school ELA just by thinking of important lessons and developing fun activities to engage and challenge your students.  If you’re interested in the centers we have created, you can purchase them here.  Everything is ready for you to print and place in binders, including the checklists for grading them.

literacy centers cover page

Happy Teaching!

Literature Circles Using Reading Signposts in Middle School ELA

Have you heard of the reading signposts?  If not, you need to purchase the book Notice and Note Strategies for Close reading by Kylene Beers and Robert Probst.  More information is provided about the signposts later in this post.  Mainly, however, this post will explain how we hold literature circles using reading signposts in middle school ELA.

We call literature circles book clubs in my classrooms.  The kids just get more excited about a “club”.  We recently had our second book club meetings in my seventh grade classroom, and I must say that it was a success!  Four main ingredients contributed to the success:  snacks, comfortable spots, great novels, and the six reading signposts.

First, snacks. Snacks generate excitement.  It doesn’t have to be something huge, just a cookie will do, or a Blow Pop, but allowing students to have a little treat during meetings keeps them looking forward to the discussions!

Comfortable spots- carpet pieces, comfy chairs, bean bags, anything goes.  When students get the chance to get out of their desks for a while, they see that as a treat, and the opportunity to have book club meetings should be a treat!

Next, good novels!  Don’t put boring books on your list of book club books.  You want books that students will fall in love with and won’t soon forget!

Finally, the remainder of this blog post will be about the six reading signposts.  Wow, they have seriously changed my ELA world!

Recently, I introduced my students to the six reading signposts which are described in Robert E. Probst and Kylene Beer’s new book, Notice and Note Strategies for Close reading (which by the way, you need to order ASAP if you have not already).  The signposts are a game changer when it comes to teaching students to complete a close read.   Basically, there are six noticeable concepts that are present in most all novels.  These are called “signposts”.  Each signpost has a question that accompanies it.  When students recognize a signpost, they are to stop and ask themselves the question that goes along with it.  This will help them to comprehend and analyze what they are reading.  For example, one signpost is “Words of the Wiser”.  This is present when an older character gives advice or insight to the main character. (I bet you can think of plenty of young adult novels with this signpost, right?) When students notice this in a text, they should stop and ask the question that accompanies this signpost, which is “How might this change things?”  Each time students see this signpost, they stop and ask themselves the same question.

Click here to see a chart of the six signposts and the questions that accompany them.  

As students are reading their novels, they place post-it notes where they see one of the reading signposts (contrast and contradiction, memory maker, tough question, again and again, aha moment, words of the wiser).  I do not require them to stop and write anything, only to mark the signpost and think of and answer the question that accompanies it.  I provide bookmarks with the six signposts, definitions, and questions for them to use while reading.

In preparation for the book club meetings, students look back through their books at the Post-it note marked signposts.  They choose two that they think would make worthy discussion for the meetings.  Students record those two on their book club preparation sheet, complete with the question that accompanies the signpost and their own answer to that question.  Then, this is one of the main items on the discussion agenda during the meetings.

By far, having book clubs or literature circles using reading signposts in middle school ELA has worked wonders.  My students agreed.  I asked them to give me honest feedback about using the signposts as springboards for discussion during the meetings.  They all assured me, “Mrs. Temple, it works great!”

Check out our book club resource before leaving our site!  It has all of the resources that we use, including signpost bookmarks and preparation sheets for students to use along with their signpost post-it notes to prepare for the meetings.

book club pic